
To understand whether or not your digital marketing campaign is working, you must establish proper conversion tracking. Since so many people are visiting websites on their mobile devices today, then you should be tracking phone call clicks as conversions; otherwise, you could be missing out on a lot of useful data. Here’s how to set this up with Google Tag Manager.
Phase 1: Create a Trigger That Fires When The Click Url Contains “Tel”
To make phone numbers clickable on websites, we write “tel.” For example, “tel:2035555555” would make 203-555-5555 clickable.
In phase 1, we are creating a trigger that will always be “looking” for a link that contains “tel”
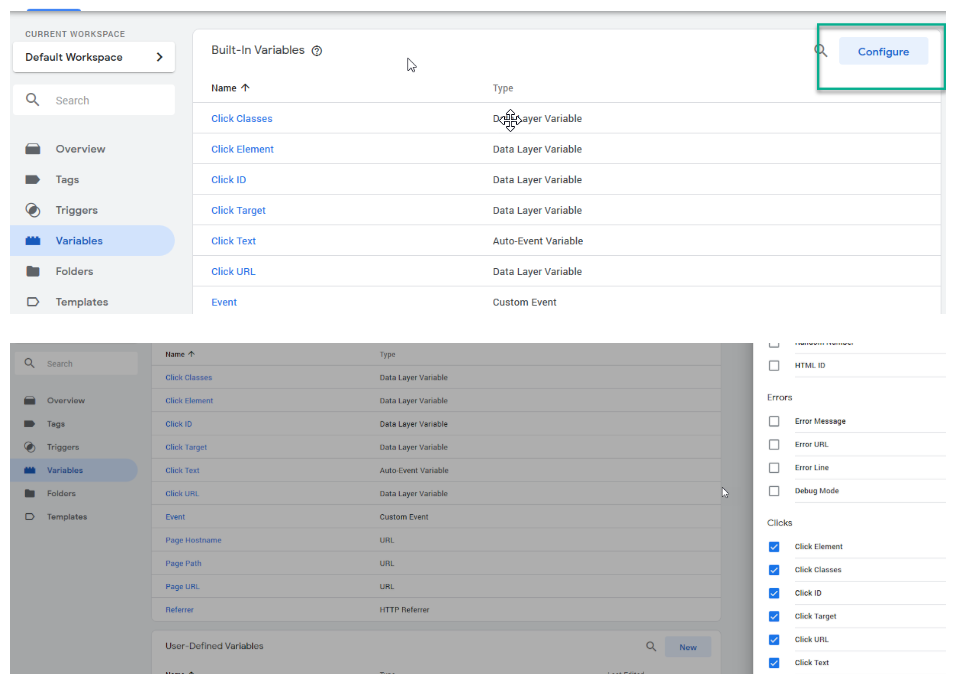
Step 1: Enable All Click Variables
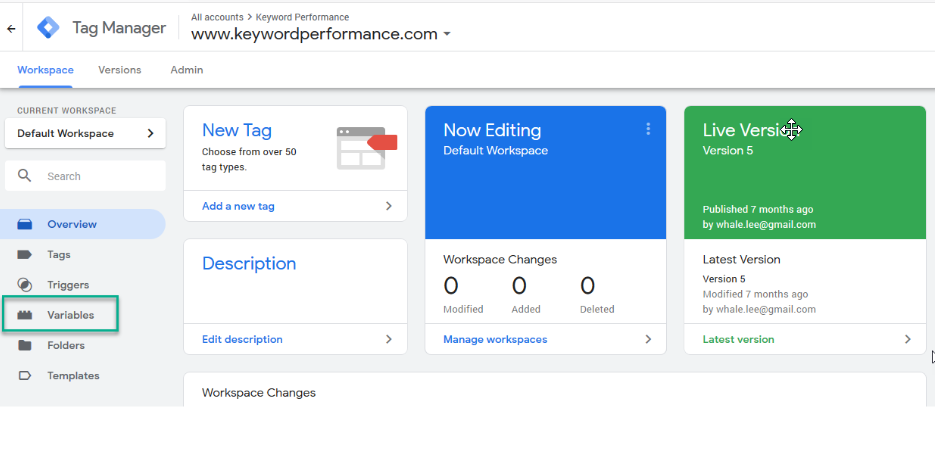
Click “Variables” From the GTM Dashboard
Click “Configure,” Scroll Down to “Clicks,” and Check All Boxes
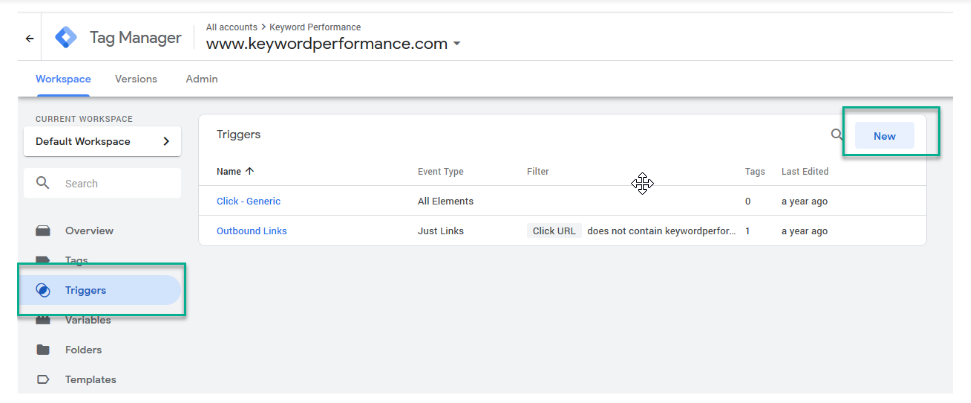
Step 2: Create The Trigger
Click “Triggers,” Then “New”
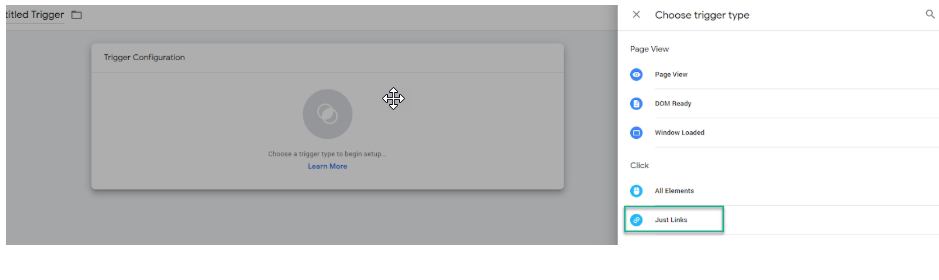
Under “Click”, Choose “Just Links”
Under “This Trigger Fires On,” Choose “Some Link Clicks”
Choose “Click Url” in the Left Box, “Contains” In the Middle, and Write “tel” in the Right

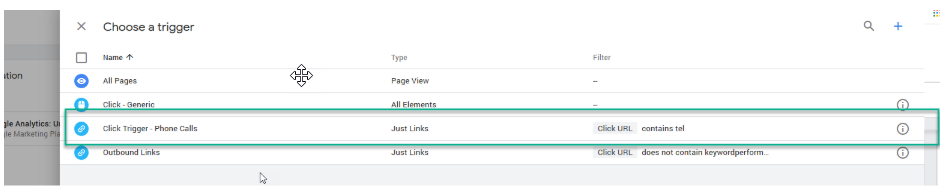
Name the Trigger Something Like “Click Trigger – Phone Calls” and Save.
Phase 2: Link The Trigger to a Tag
In order to put the trigger we created to use, it must be connected to an event-based tag. Once it is published, this tag will pass our data into Google Analytics.
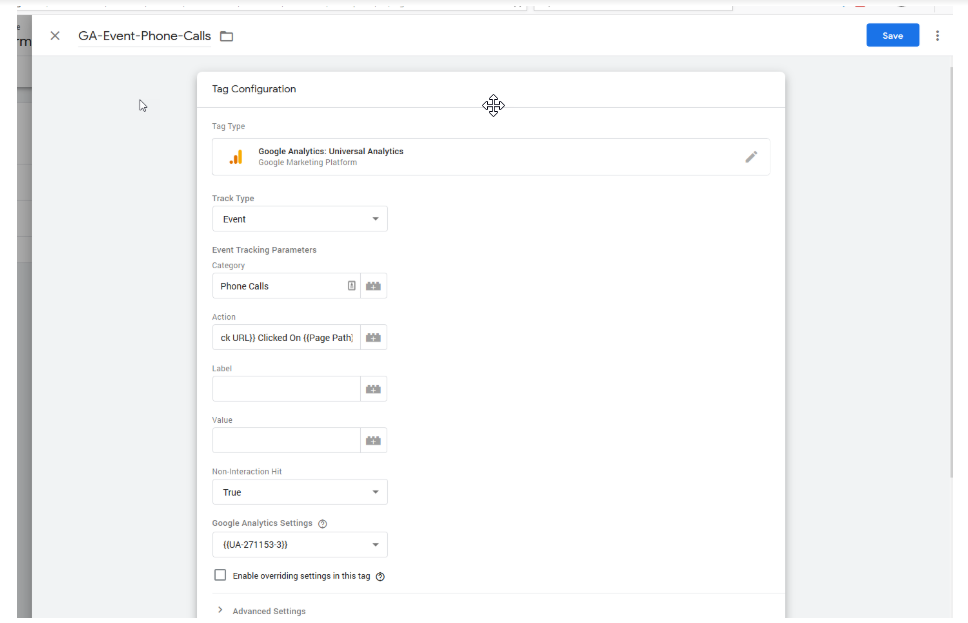
Step 1: Create The Tag
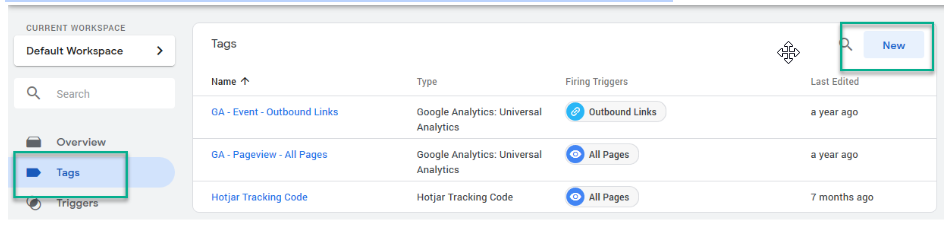
Click “Tags” From The Sidebar and Click “New”
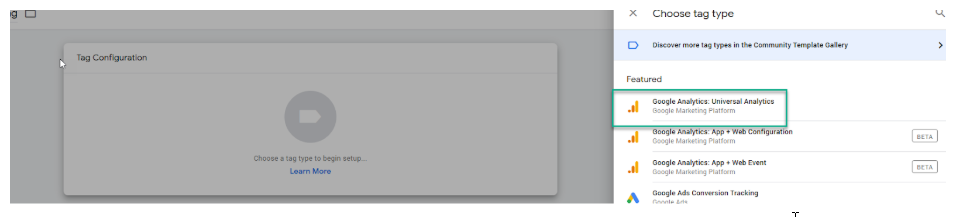
Click Into “Tag Configuration” and Select “Google Analytics: Universal Analytics” (The First Option)
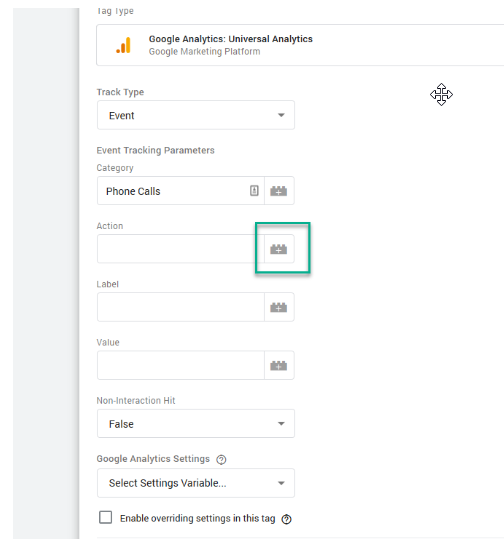
For “Track Type,” Choose “Event”
Name the Category “Phone Calls”
For “Action” Click The Plus Sign. This will open a list of variables.
From Here, Select “Click Url”
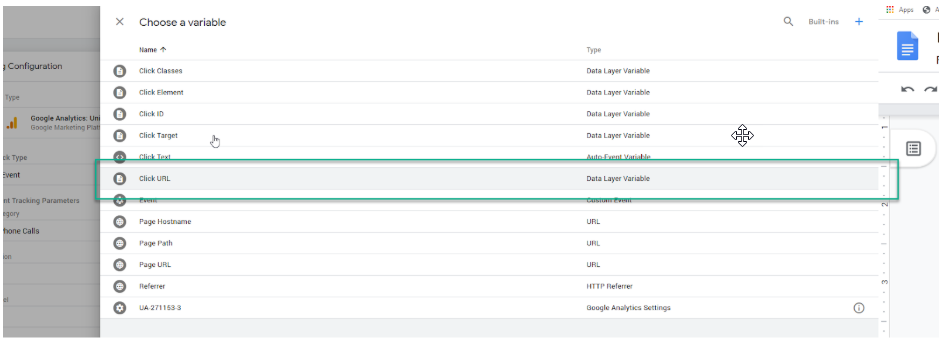
You Will Use This Menu to Select The “Page Path” Variable. The End Result Will Be
{{Click URL}} Clicked On {{Page Path}}
This will tell us what page the phone number was clicked on.
Leave “Label” and “Value” Blank
Change Non-Interaction Hit to “True”
Under “Google Analytics Settings” Select Your Saved Analytics Variable
Step 2: Select The Click Trigger You Created Earlier
Click Into “Triggers” and Select “Click Trigger – Phone Calls”
Name The Tag Something Like “GA-Event-Phone-Calls” and Save.
Final Step: Publish The Tag and Test It
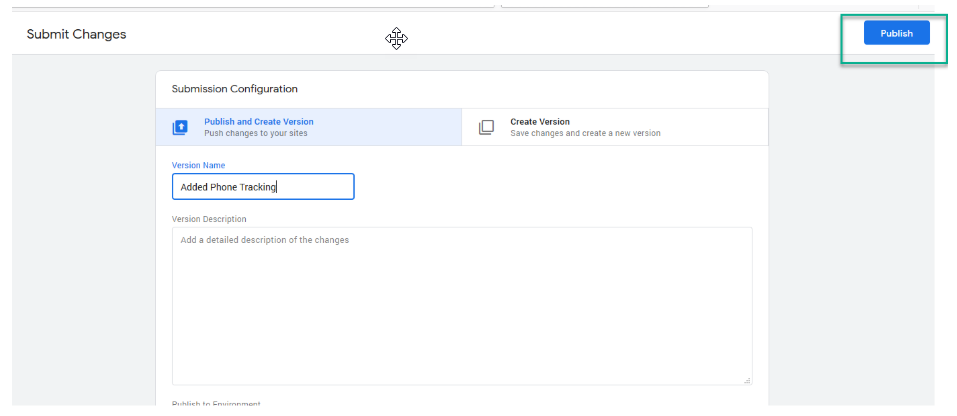
Publish The Tag By Hitting “Submit” in the Top Right Corner.
In the Version Name Field, Write Something Like “Added Phone Tracking” and Hit “Publish”
Test The Tag By Opening the Real Time Report In Analytics, Selecting “Events,” and Clicking on a Phone Number via a Mobile Device. If You See The Phone Number – Click On “Page Url” Then You Did It Right
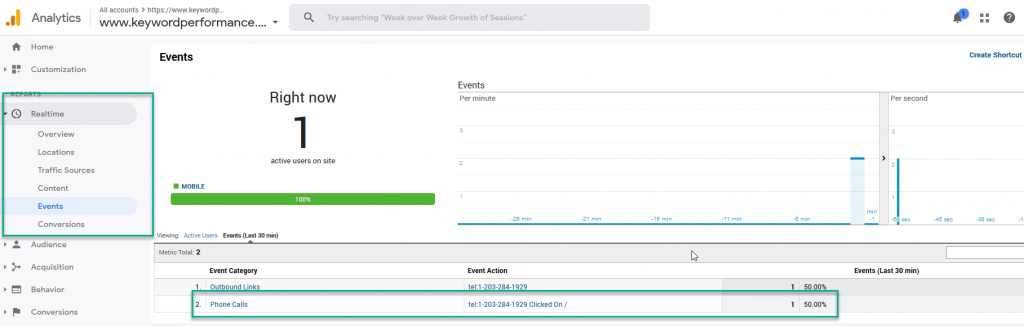
As We Can See, The Phone Number was Clicked on The Homepage; therefore, The Tag is Working Properly.
Final Phase: Turn Phone Call Clicks Into a Conversion Goal
Once You’ve Got This Working, You’ll Want to Turn This Into a Conversion Goal. Doing so Will Allow You to See What Channel The Phone Call Click Are Coming From.
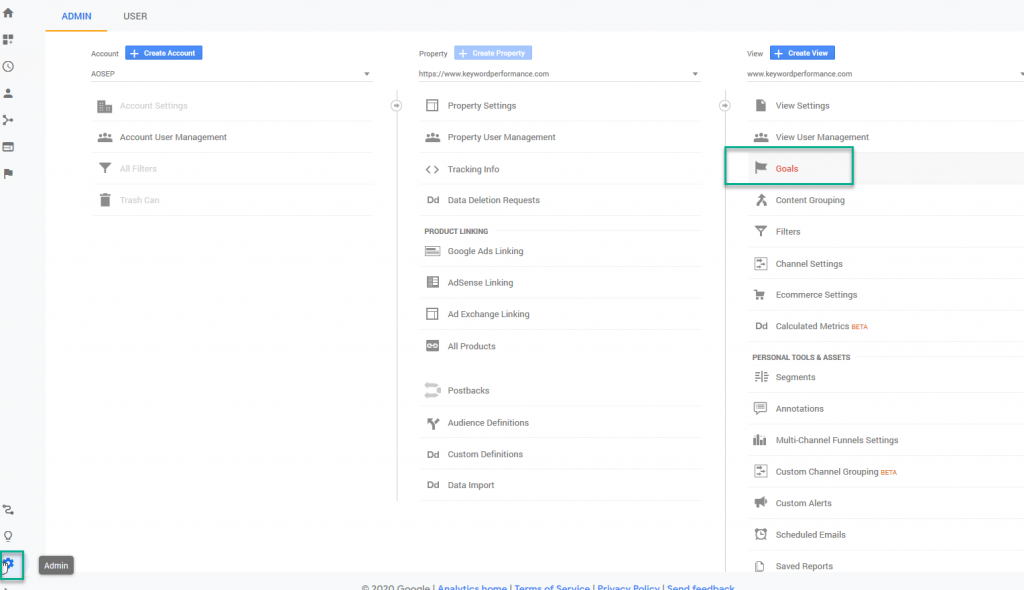
Create An Event-Based Goal
Click “Admin,” “Goals,” then “+ New Goal”

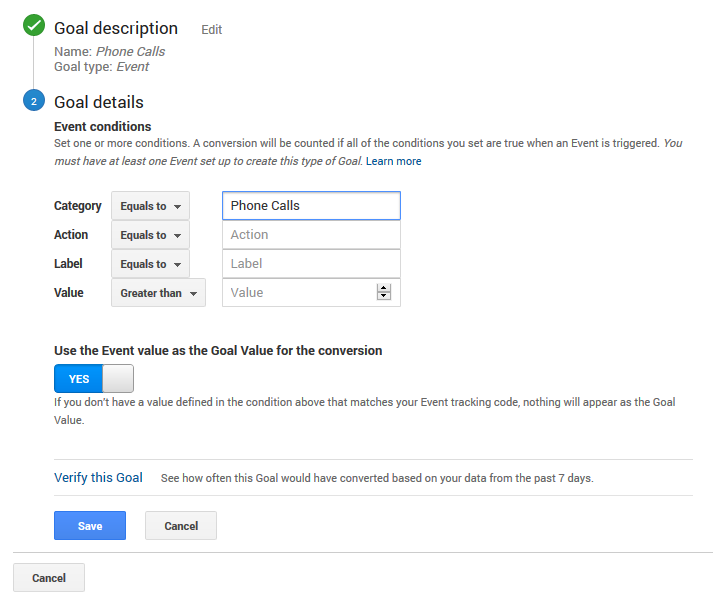
Name The Goal “Phone Calls” and Select “Event”

Finally, Put “Phone Calls” In The “Equals To” Category Field and Save It
See Phone Call Clicks By Channel
In Google Analytics, Go to Acquisition < All Traffic < Channels
Set Your Date Range, and Select Your “Phone Calls” Goal
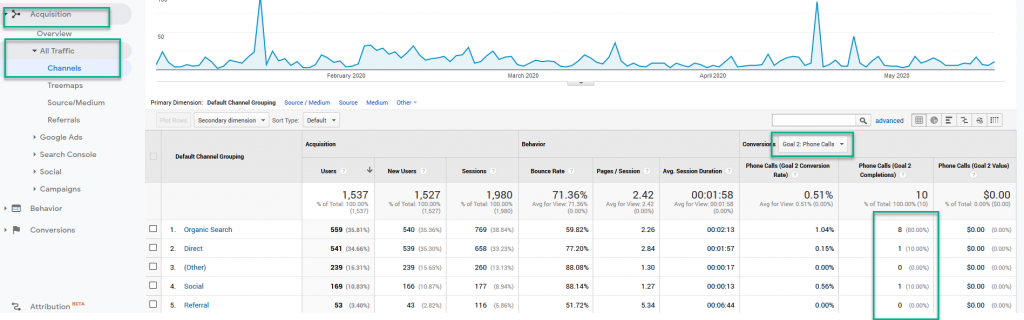
In This Example, We See That 8 Phone Calls Came From SEO, 1 Came From Direct, and 1 Came From Social Media
Now It’s Your Turn! If You Need Help, Give Us a Call, or Send us an Email.
